When to pick a custom tool over an MCP server: an MCP server exposes many tools at once and is reusable across agents. A custom tool is a single endpoint you wire up directly. If you only need one or two specific actions and you already have (or want) a Builder automation, a custom tool is faster.
How it works
When the LLM decides to invoke the tool, the platform sends aPOST to your endpoint with a JSON body containing the arguments. Whatever you return becomes the tool’s observation in the conversation.
Step 1 — Build the endpoint as a Builder automation
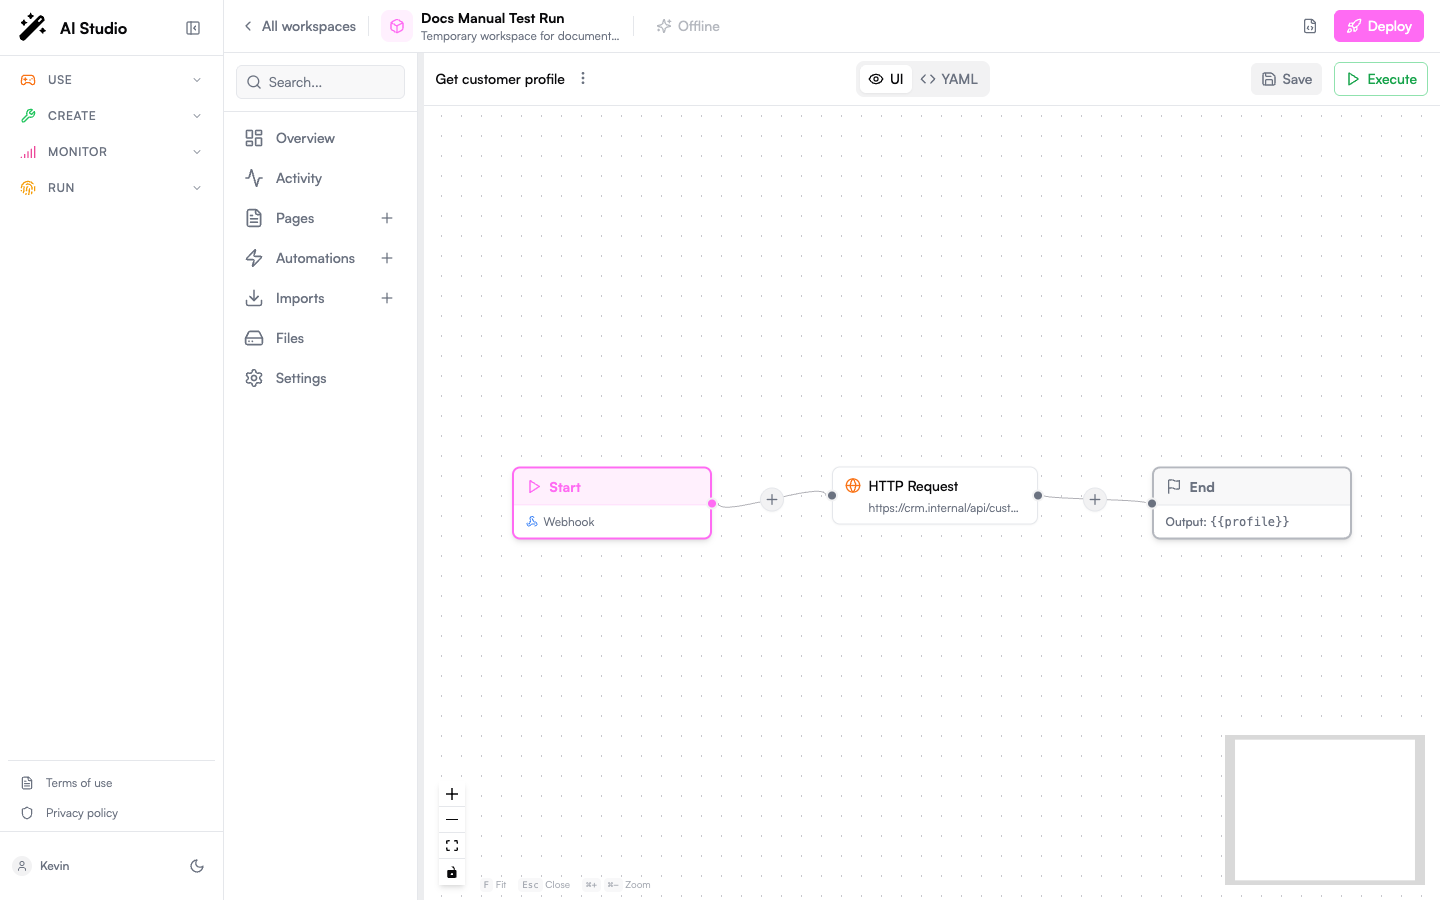
This is the recommended path: you stay inside Prisme.ai, secrets and access control are already handled, and the call shows up in Activity / Insights.- Open your workspace in Builder.
- Create a new automation (e.g.
getCustomerProfile). - Set the trigger to Endpoint so the automation is reachable over HTTP.
- Declare the input schema under Arguments — those become the parameters the agent sees.
- Implement the logic (
fetch,Custom Code.run,Collection.findMany, etc.). - Set an
outputso the response payload is well-defined.
https://api.studio.prisme.ai/v2/workspaces/<id>/webhooks/getCustomerProfile. Copy it; you’ll paste it into the agent in step 2.
Step 2 — Attach the tool to your agent
- Open the agent in Agent Creator.
- Click the Capabilities tab.
- Click Add Capability.
- Select the Custom tab.
- Pick Custom Function (the catalog entry, marked with a ⚡ icon).
| Field | What to put |
|---|---|
| Display Name | Human-readable label shown in the UI (Customer profile lookup) |
| Function Name | Unique technical name the LLM uses to call the tool. Snake-case, no spaces (get_customer_profile) |
| Endpoint URL | The webhook URL from step 1 |
| Description | What the function does — this is what the LLM reads to decide when to use it |
| Headers | Optional. For Prisme.ai webhooks you don’t need any; for external APIs, add Authorization, X-Api-Key, etc. |
| Parameters Schema | A JSON Schema describing the function arguments |
Step 3 — Update the instructions
The agent doesn’t pick up tools just by being attached — your Instructions need to tell it when to use them.
When the user mentions a customer by id or asks about their plan, call get_customer_profile with the id, then summarize subscription status, plan tier, and renewal date.
Without this nudge, the LLM may ignore the tool or use it inconsistently.
Step 4 — Test in the Playground
Open the Playground and try a prompt that should trigger the tool. You’ll see:- The function call (name + arguments) the agent decided on
- The raw JSON response from your endpoint
- The agent’s final reply built from that response
Calling an external endpoint instead of a Builder automation
Skip step 1 and point the Endpoint URL at any HTTPS endpoint. You typically need to:- Add an
AuthorizationorX-Api-Keyheader in the Headers section - Make sure the endpoint accepts JSON in the body matching your Parameters Schema
- Ensure responses are JSON (the agent renders strings as text, but JSON gives it structure to reason over)
Best practices
Names and descriptions are your tool-selection prompt
Names and descriptions are your tool-selection prompt
The LLM sees only
name, description, and the parameter schema. Treat these like a prompt: tell it precisely what the tool does and when to use it. Avoid tool_1 / do_thing.Keep parameters small and well-typed
Keep parameters small and well-typed
Use
enum for fixed sets (e.g. status: [active, cancelled, trialing]). Mark required fields. Each parameter description should help the LLM extract the value from the user’s message.Return JSON, not prose
Return JSON, not prose
{ "plan": "pro", "renews_on": "2026-08-12" } is much more useful to the agent than The customer is on the pro plan and renews on 2026-08-12. The agent will turn the JSON into prose itself.Fail loudly, with structure
Fail loudly, with structure
On errors, return
{ "error": "customer_not_found", "customerId": "cus_12345" } rather than an HTTP 500 with no body. The agent can react (“I couldn’t find that customer — can you confirm the id?”) instead of bailing out.One tool, one job
One tool, one job
Resist the temptation to ship a “do_anything” tool with a
verb parameter. Multiple narrow tools are easier for the LLM to pick correctly than one fat tool with a switch.Editing or removing a tool
In the Capabilities tab:- Click the gear icon next to a tool to update its URL, parameters, or description.
- Click the trash icon to remove it. Don’t forget to update your Instructions if they reference the removed tool.
Next steps
Build the endpoint
Learn how to write an automation, declare arguments, and expose a webhook.
Custom Code in automations
Run custom JavaScript or Python inside the automation that powers your tool.
Capabilities reference
See all capability types — MCP, Skills, File Search, Guardrails, Sub-agents.
Test in Playground
Watch tool calls live and tune descriptions until selection is reliable.