What You’ll Build
A complete RAG system with:- A Knowledge Base in Knowledges containing your documents
- Vector embedding and retrieval handled by the Knowledge Base
- An agent in Agent Creator that consumes that Knowledge Base for context
- The Agent Creator Playground for testing conversations
- Evaluations and Analytics in Agent Creator for ongoing quality control
This split lets Data Scientists, Data Engineers, Developers, and Business Teams collaborate from a single source of truth: knowledge stays curated in one place, while agents that depend on it are configured and tested independently.
Prerequisites
Before starting this tutorial, make sure you have:- Access to a Prisme.ai workspace with Knowledges and Agent Creator enabled
- Basic understanding of prompting concepts
- Documents to ingest (web pages, PDFs, Word documents, PowerPoint presentations, etc.)
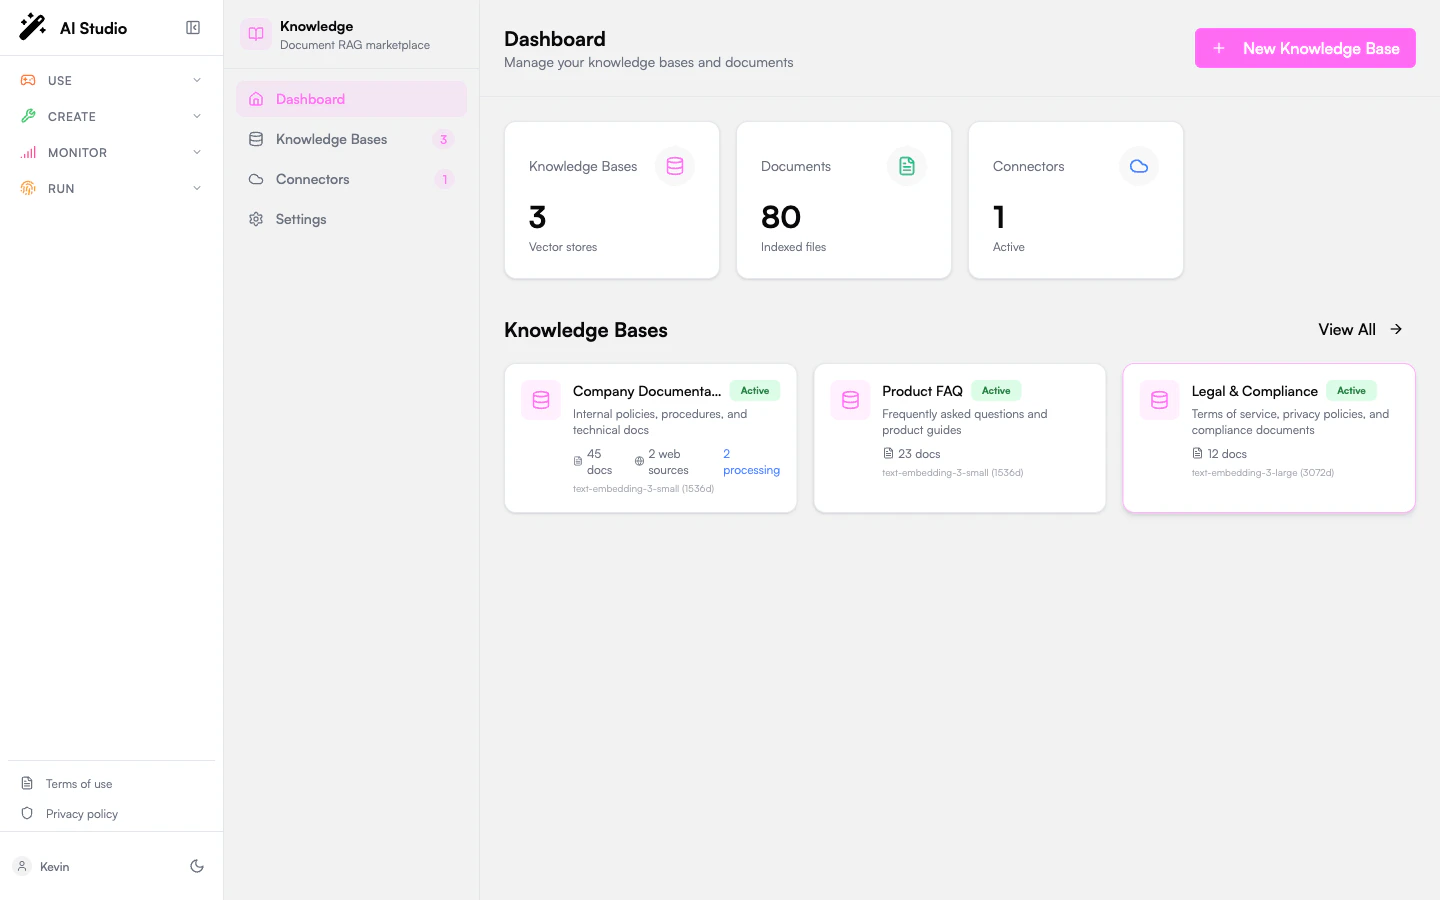
Step 1: Understanding the Knowledges Interface
Let’s start by orienting ourselves inside the Knowledges product.Explore the navigation
The left sidebar gives you four entries:
- Dashboard: overview with high-level stats — number of Knowledge Bases, Documents, and Connectors.
- Knowledge Bases: the list of every knowledge base in your workspace, with quick access to each one.
- Connectors: third-party SaaS integrations (SharePoint, Google Drive, Notion, Confluence) that sync content into Knowledge Bases. Note: web crawling and direct file uploads are not here — they live on each Knowledge Base’s detail page via Add Web Source and Add Documents.
- Settings: workspace-level Knowledges settings.
Step 2: Create a Knowledge Base
Now create the knowledge base that will hold your documents.Start a new Knowledge Base
Click the + Create button in the top-right (the Dashboard’s + New Knowledge Base tile opens the same dialog).
Name and configure it
Give the Knowledge Base a clear name and description that reflect what it covers. Pick the embedding model you want to use for vectorization — the choice affects retrieval quality and cost.

Knowledges is model-agnostic for both embedding and generation, so you can swap models later without rebuilding the knowledge base from scratch.
Step 3: Add Documents
With the Knowledge Base open, ingest your content.Add documents
Click Add Documents and either upload files from your computer or paste URLs to web content. For full website ingestion, see the Add Web Source flow on the Knowledge Base detail page.
Configure document processing
Per Knowledge Base, you can adjust how content is chunked before embedding:
- Text Splitter: static (fixed-size chunks) or dynamic (content-aware) segmentation
- Chunk Size: the size of each segment
- Overlap: how much content overlaps between adjacent chunks to preserve context
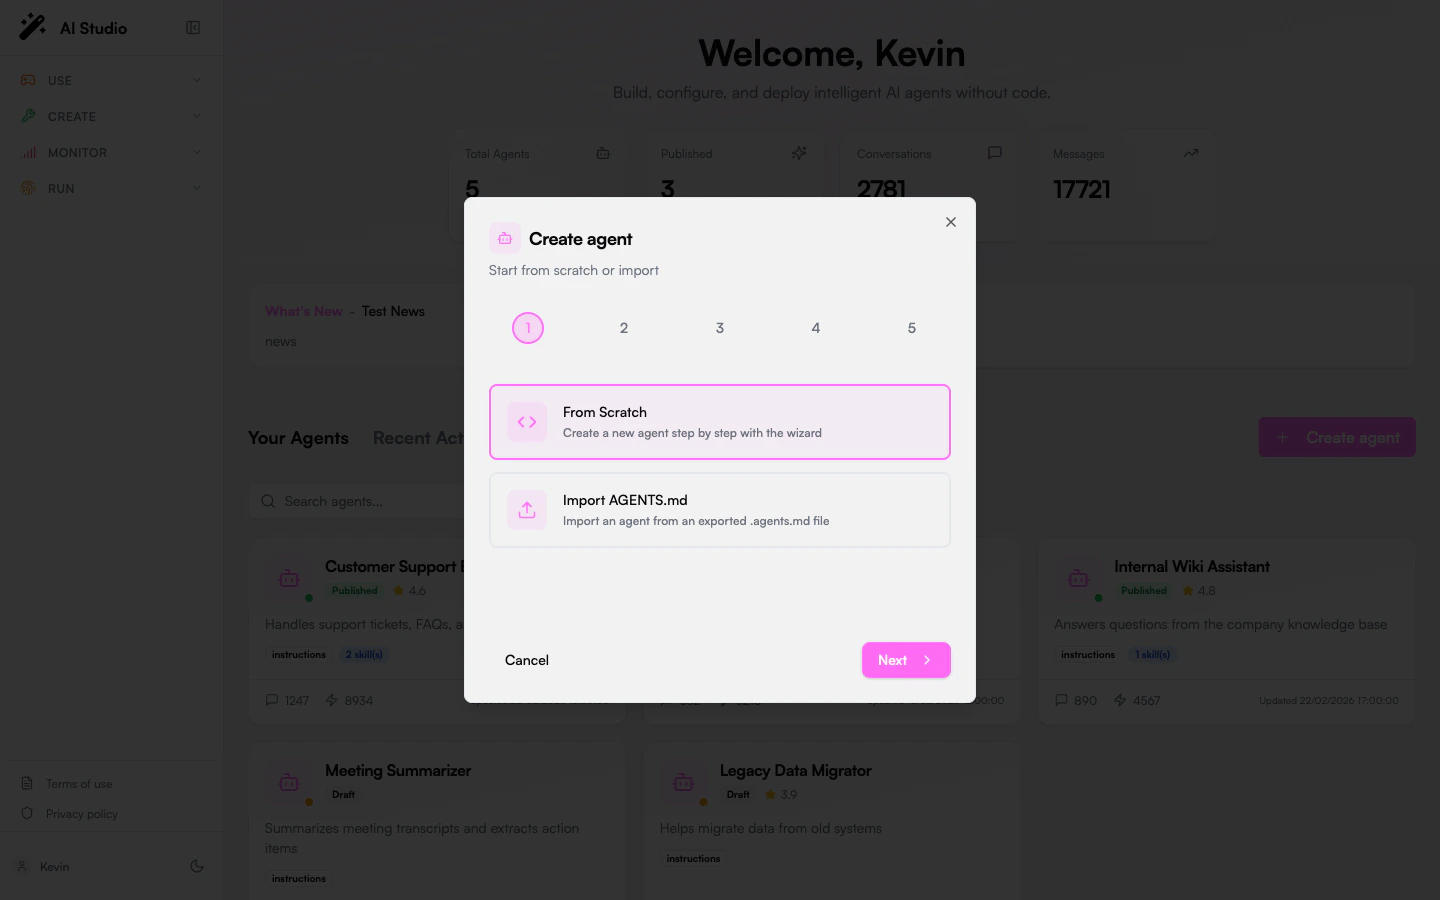
Step 4: Create an Agent in Agent Creator and Connect the Knowledge Base
The knowledge base is ready. Now create the agent that will use it.Set instructions and model
Write the agent’s system instructions (its role, tone, what it should and shouldn’t do) and pick the generation model.
Step 5: Chat With Your Agent in the Playground
Time to try it.Source transparency is a first-class feature: every answer in the Playground (and in production) shows which chunks were used, so you can audit grounding without leaving the agent’s page.
Step 6: Evaluations (Test-Driven Building)
Evaluations live alongside the agent in Agent Creator, which keeps quality checks tied to the thing being tested.Define test cases
Each test case pairs a question a user might ask with the expected answer the agent should produce.
Schedule runs
Configure how often the suite runs (daily, weekly, on demand) and whether it should fire automatically after agent changes.
Business experts can manually grade responses, context, and hallucinations. Re-run the suite after every meaningful change — instructions, model, retrieval parameters, chunking, or attached Knowledge Base — so regressions surface immediately.
Step 7: Advanced Customization
Once the basics work, you can extend the system with custom logic that reacts to Knowledge Base activity. The pattern is the same in both cases: a Builder automation (or an external service) listens for platform events emitted by the Knowledge Base and runs your custom logic in response.- Using Builder Product
- Using External Code
Create an event-triggered automation
Create an automation whose
when block subscribes to the Knowledge Base events you care about — for example, document add/update/delete or query events. See the Automations reference for the trigger syntax.Step 8: Handling PII and Safety Controls
For sensitive content, route Knowledge Base events through your own safety layer.Implement PII controls
Subscribe a Builder automation to Knowledge Base events (document ingest, query) and run PII detection inside that automation before sensitive content is stored or returned.
Configure data anonymization
Decide whether to anonymize personal data based on your use case and compliance requirements.
Step 9: Monitoring and Maintenance
Keep the agent healthy with the right monitoring surface for each concern.Monitor agent conversations in Insights
For cross-agent analytics on real user conversations — adoption, topics, feedback, clusters — use the Insights product. See Insights overview.
Check per-agent usage in Agent Creator
Open the Analytics tab on the agent itself for usage metrics specific to that agent (volume, latency, token consumption, response quality).
Set up alerts
Use a Builder automation subscribed to Knowledge Base events to push alerts into Slack, Teams, or Jira when something goes wrong.
Maintain the Knowledge Base
Refresh documents as content changes, retire stale sources, and keep connectors synced.
Best Practices for High-Performance RAG
To maximize the effectiveness of your RAG agent, consider these recommendations:Knowledge Architecture
Design a well-organized structure for easy access and interpretation by AI systems
Data Quality
Ensure data is accurate, well-formatted, and relevant—this accounts for ~80% of success
Hybrid Technologies
Consider combining NLU for tag extraction with LLMs for generation to improve efficiency
Continuous Optimization
Regularly monitor response times, accuracy, and retrieval effectiveness
Wrapping Up
You’ve built a RAG agent without writing code: documents ingested into a Knowledge Base in Knowledges, an agent configured in Agent Creator that retrieves from that Knowledge Base, and a Playground plus Evaluations workflow for ongoing quality. The clean split between knowledge and agent makes it easy to evolve each side independently — swap models, refine instructions, or replace the Knowledge Base — without rebuilding the rest.Next Steps
Document Classification
Learn how to automatically classify and organize your documents with AI
AI Contact Routing
Create an intelligent contact form that routes inquiries to the right department
Webhook Integration
Build advanced integrations between your RAG agent and other systems
Website to RAG
Turn website content into a comprehensive knowledge base for your RAG agent