> ## Documentation Index
> Fetch the complete documentation index at: https://docs.prisme.ai/llms.txt
> Use this file to discover all available pages before exploring further.
# Webhook Builder
> Create AI-enhanced API and webhook integrations with Prisme.ai
This tutorial shows you how to build powerful automations that combine webhooks, APIs, and AI capabilities. You'll learn to create a system that can receive data via webhooks, process it with custom code, and use AI to generate intelligent summaries—all without managing traditional databases.
## What You'll Build
A complete API and webhook integration with:
* A webhook endpoint to receive external data
* Custom code processing for data transformation
* AI-powered text summarization using an Agent Creator agent (called via the Agent Factory App)
* Seamless event-driven communication between components
This solution demonstrates how Prisme.ai can transform simple API integrations into intelligent data processing systems using generative AI to extract insights from incoming data.
## Prerequisites
Before starting this tutorial, make sure you have:
* An active Prisme.ai account
* The Agent Factory App installed in your workspace (search for "Agent Factory App" in the marketplace; its automation namespace is `Agents`)
* An **Agent Factory API key** generated in Agent Creator (open any agent → **Settings** → **API Keys**) and pasted into the Agent Factory App's configuration field `apiKey` after installing it. This is required for the webhook to call the agent from an unauthenticated request — without it, `Agents.sendMessage` returns `401 UNAUTHORIZED`.
* The Custom Code app installed in your workspace
* An agent created in the [Agent Creator](/products/agent-factory/creating-agents) product, configured with the system instructions you want for the summary task
## Step 1: Creating Your Workspace
Let's start by setting up a dedicated workspace for our webhook integrations:
Log in to AI Studio and open the Builder product. Your workspaces list lives at `/builder`.
Click "+ Create new workspace", then on step 1 choose "From Scratch".
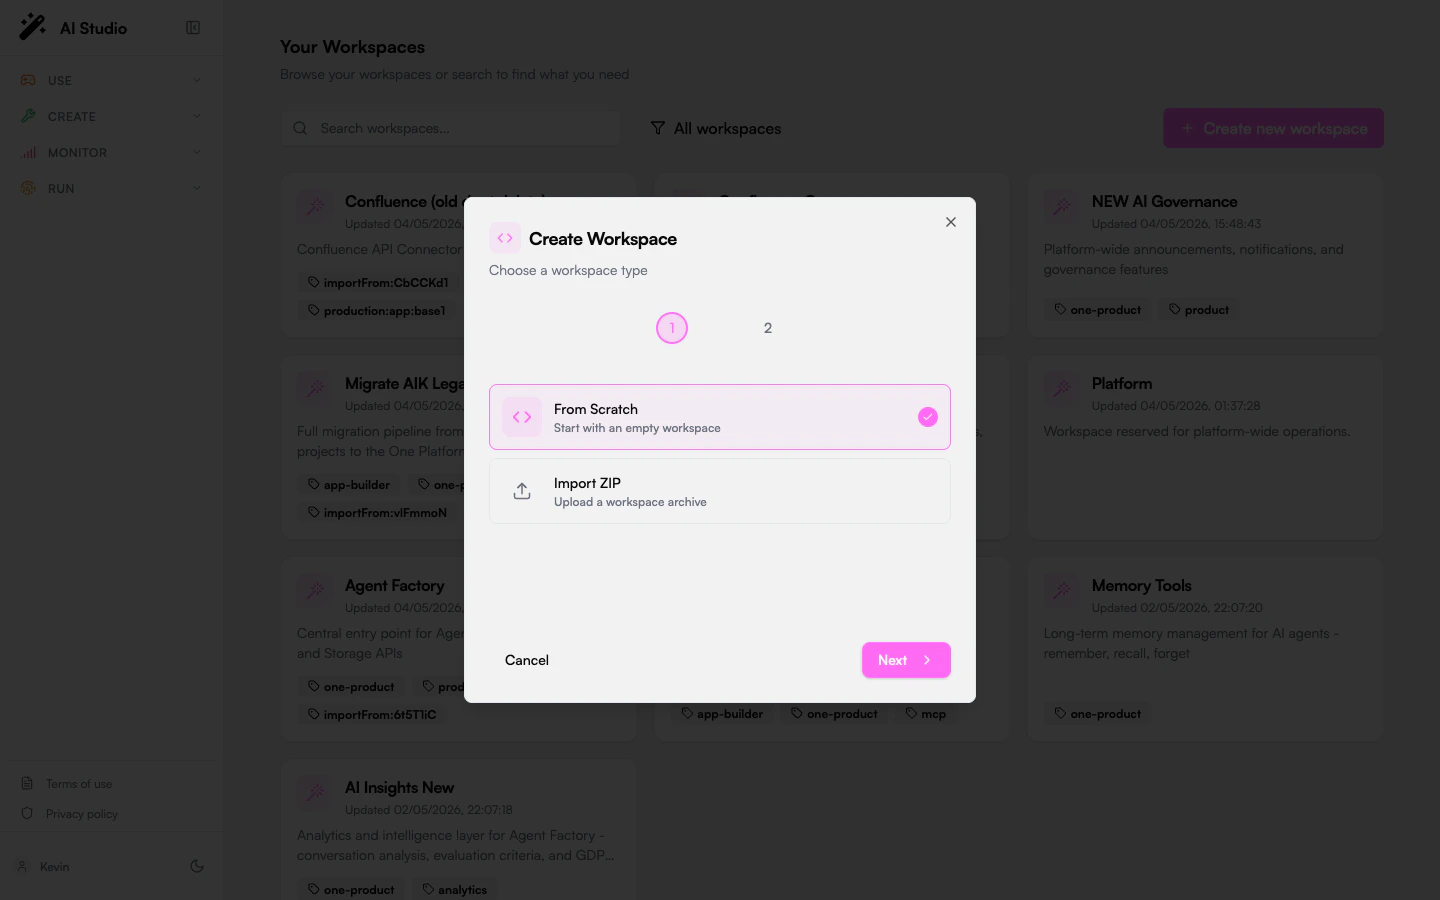 On step 2, fill in:
* Name: "AI API Integrator" (or a name of your choice)
* Description: a short summary of the workspace purpose
Click "Create Workspace" to land in the empty workspace.
On step 2, fill in:
* Name: "AI API Integrator" (or a name of your choice)
* Description: a short summary of the workspace purpose
Click "Create Workspace" to land in the empty workspace.

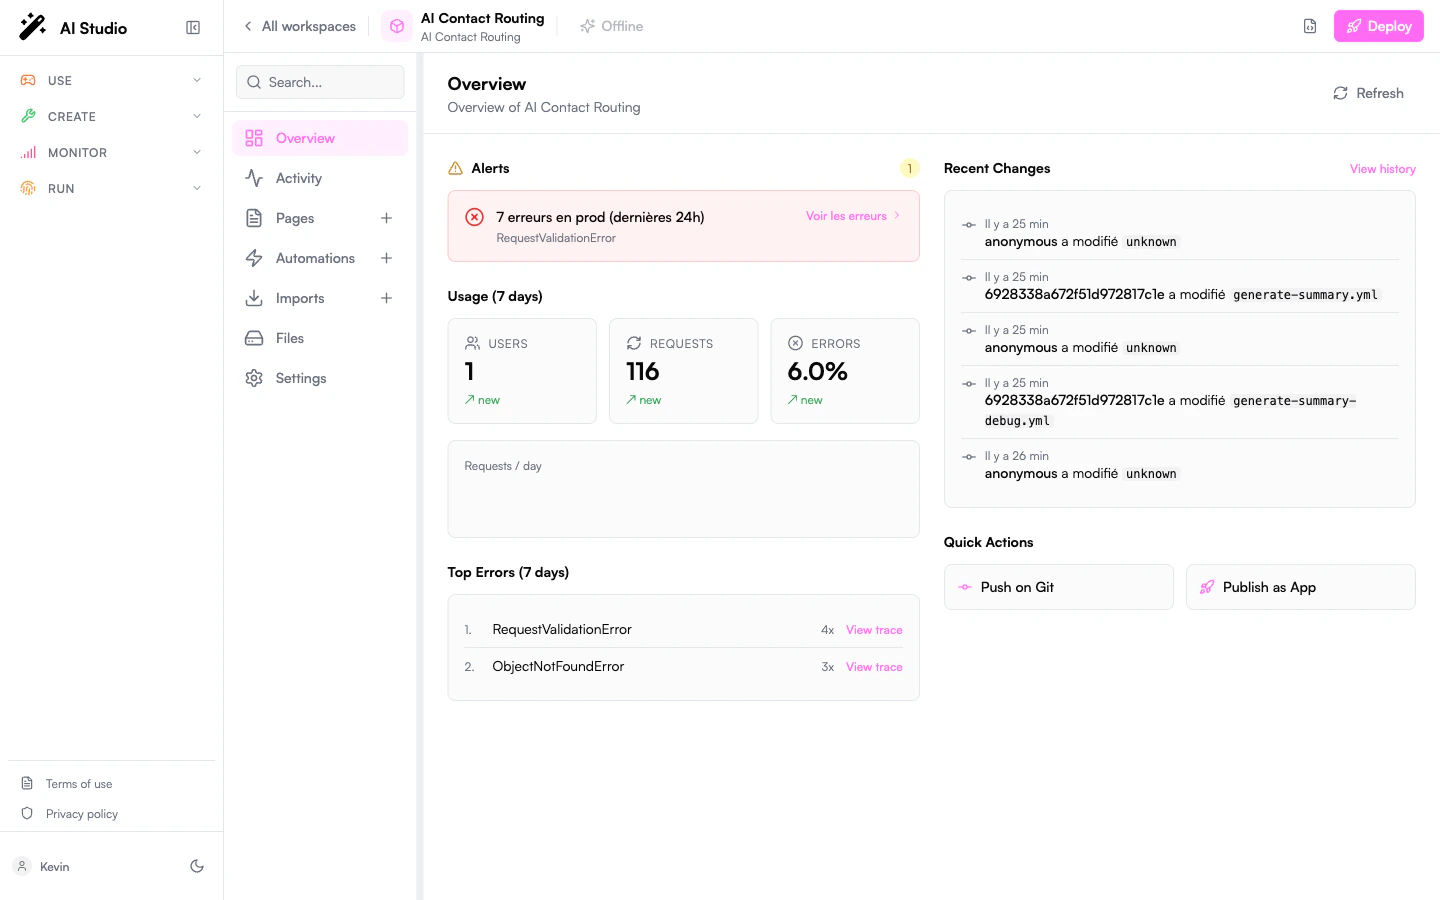 *The screenshot shows an existing populated workspace; yours will start empty until you add automations and pages.*
## Step 2: Creating the Summary Generation Automation
First, let's create the automation that will use AI to generate summaries from JSON data. The actual summarization prompt lives on the agent itself in Agent Creator — this automation only forwards the user message.
In your workspace, go to the Automations section.
Create a new automation with:
* Name: "Generate Summary"
* Slug: "generate-summary"
Use the following YAML configuration:
```yaml theme={null}
slug: generate-summary
name: Generate Summary
do:
- set:
name: stringifiedData
value: '{% json({{payload.data}}) %}'
- Agents.sendMessage:
agent_id: '{{config.summaryAgentId}}'
message:
parts:
- type: text
text: '{{stringifiedData}}'
output: agentResponse
when:
events:
- summary-event
output: '{{agentResponse.task.output.messages[0].parts[0].text}}'
```
Save the automation.
The instruction "Create a brief summary from a JSON object, focusing on key details and overarching information…" should be set as the **system instructions on the agent itself**, in Agent Creator — not in this YAML. The automation only sends the user message; the agent's behavior is fully owned by its configuration.
Store the agent's ID under your workspace **Configuration** as `summaryAgentId` so it's easy to swap later. To get the ID, open the agent in Agent Creator and copy it from the URL. Make sure the agent uses a model your organization has enabled in **Governe** (e.g. `gpt-4o`); a disallowed model returns an error in the same response shape.
We parse the JSON object as a string using the `json()` utility function because language models expect text input, not structured JSON.
`Agents.sendMessage` returns an A2A task object. The model's reply is at `agentResponse.task.output.messages[0].parts[0].text` — that's the path used in the `output:` line above. The full task object also contains `usage` (tokens, cost), `task.id`, and `task.contextId` (useful if you want to continue the conversation by passing it back as `context_id` on the next call). Inspect the activity log to see the complete shape.
## Step 3: Creating the Webhook Automation
Now, let's create the webhook automation that will receive data and trigger the summary generation:
Back in the Automations section, create another automation.
Use the following settings:
* Name: "Webhook"
* Slug: "webhook"
* Trigger: Enable "Endpoint" to make it accessible via URL
Configure the automation with this YAML:
```yaml theme={null}
slug: webhook
name: Webhook
do:
- Custom Code.run function:
function: CleanData
parameters:
data: '{{query}}'
output: cleanData
- emit:
payload:
body: '{{body}}'
headers: '{{headers}}'
data: '{{cleanData}}'
event: summary-event
when:
endpoint: true
output:
message: '{{cleanData}}'
```
Save the automation.
* Open the "Triggered when" section of your automation
* Click "Get the link"
* Copy the displayed URL, which will look like: `https://api.studio.prisme.ai/v2/workspaces/YOUR-WorkspaceID/webhooks/webhook`
## Step 4: Configuring Custom Code
Now, let's set up the Custom Code app to process our incoming data:
Open the **Imports** section in your workspace sidebar and open the Custom Code app.
Configure the Custom Code app with the following YAML:
```yaml theme={null}
appName: Custom Code
slug: Custom Code
config:
functions:
CleanData:
code: |-
return data;
parameters:
data:
type: object
default: [
{
"id": 1,
"name": "John Doe",
"email": "john.doe@example.com",
"isActive": true,
"roles": ["admin", "user"]
},
{
"id": 2,
"name": "Jane Smith",
"email": "jane.smith@example.com",
"isActive": false,
"roles": ["user"]
}
]
```
Save your Custom Code settings.
The Custom Code function includes a default value for testing purposes. In a real-world scenario, you would likely perform more complex data transformation operations here.
## Step 5: Testing Your Webhook Integration
Let's test our webhook and see the AI summary generation in action:
You can test your webhook by making an HTTP request to your webhook URL with query parameters, for example:
`https://api.studio.prisme.ai/v2/workspaces/YOUR-WorkspaceID/webhooks/webhook?city=Toulouse&country=France`
Use a tool like curl, Postman, or simply enter the URL in your browser to trigger the webhook.
The webhook should return a message containing the clean data.
Check your activity logs to confirm that the `summary-event` was triggered and that an `Agents.sendMessage` call was made to your agent with payload data such as:
```json theme={null}
{
"city": "Toulouse",
"country": "France"
}
```
Expand the `Agents.sendMessage` event in the activity log to see the full agent response captured in `agentResponse`.
*The screenshot shows an existing populated workspace; yours will start empty until you add automations and pages.*
## Step 2: Creating the Summary Generation Automation
First, let's create the automation that will use AI to generate summaries from JSON data. The actual summarization prompt lives on the agent itself in Agent Creator — this automation only forwards the user message.
In your workspace, go to the Automations section.
Create a new automation with:
* Name: "Generate Summary"
* Slug: "generate-summary"
Use the following YAML configuration:
```yaml theme={null}
slug: generate-summary
name: Generate Summary
do:
- set:
name: stringifiedData
value: '{% json({{payload.data}}) %}'
- Agents.sendMessage:
agent_id: '{{config.summaryAgentId}}'
message:
parts:
- type: text
text: '{{stringifiedData}}'
output: agentResponse
when:
events:
- summary-event
output: '{{agentResponse.task.output.messages[0].parts[0].text}}'
```
Save the automation.
The instruction "Create a brief summary from a JSON object, focusing on key details and overarching information…" should be set as the **system instructions on the agent itself**, in Agent Creator — not in this YAML. The automation only sends the user message; the agent's behavior is fully owned by its configuration.
Store the agent's ID under your workspace **Configuration** as `summaryAgentId` so it's easy to swap later. To get the ID, open the agent in Agent Creator and copy it from the URL. Make sure the agent uses a model your organization has enabled in **Governe** (e.g. `gpt-4o`); a disallowed model returns an error in the same response shape.
We parse the JSON object as a string using the `json()` utility function because language models expect text input, not structured JSON.
`Agents.sendMessage` returns an A2A task object. The model's reply is at `agentResponse.task.output.messages[0].parts[0].text` — that's the path used in the `output:` line above. The full task object also contains `usage` (tokens, cost), `task.id`, and `task.contextId` (useful if you want to continue the conversation by passing it back as `context_id` on the next call). Inspect the activity log to see the complete shape.
## Step 3: Creating the Webhook Automation
Now, let's create the webhook automation that will receive data and trigger the summary generation:
Back in the Automations section, create another automation.
Use the following settings:
* Name: "Webhook"
* Slug: "webhook"
* Trigger: Enable "Endpoint" to make it accessible via URL
Configure the automation with this YAML:
```yaml theme={null}
slug: webhook
name: Webhook
do:
- Custom Code.run function:
function: CleanData
parameters:
data: '{{query}}'
output: cleanData
- emit:
payload:
body: '{{body}}'
headers: '{{headers}}'
data: '{{cleanData}}'
event: summary-event
when:
endpoint: true
output:
message: '{{cleanData}}'
```
Save the automation.
* Open the "Triggered when" section of your automation
* Click "Get the link"
* Copy the displayed URL, which will look like: `https://api.studio.prisme.ai/v2/workspaces/YOUR-WorkspaceID/webhooks/webhook`
## Step 4: Configuring Custom Code
Now, let's set up the Custom Code app to process our incoming data:
Open the **Imports** section in your workspace sidebar and open the Custom Code app.
Configure the Custom Code app with the following YAML:
```yaml theme={null}
appName: Custom Code
slug: Custom Code
config:
functions:
CleanData:
code: |-
return data;
parameters:
data:
type: object
default: [
{
"id": 1,
"name": "John Doe",
"email": "john.doe@example.com",
"isActive": true,
"roles": ["admin", "user"]
},
{
"id": 2,
"name": "Jane Smith",
"email": "jane.smith@example.com",
"isActive": false,
"roles": ["user"]
}
]
```
Save your Custom Code settings.
The Custom Code function includes a default value for testing purposes. In a real-world scenario, you would likely perform more complex data transformation operations here.
## Step 5: Testing Your Webhook Integration
Let's test our webhook and see the AI summary generation in action:
You can test your webhook by making an HTTP request to your webhook URL with query parameters, for example:
`https://api.studio.prisme.ai/v2/workspaces/YOUR-WorkspaceID/webhooks/webhook?city=Toulouse&country=France`
Use a tool like curl, Postman, or simply enter the URL in your browser to trigger the webhook.
The webhook should return a message containing the clean data.
Check your activity logs to confirm that the `summary-event` was triggered and that an `Agents.sendMessage` call was made to your agent with payload data such as:
```json theme={null}
{
"city": "Toulouse",
"country": "France"
}
```
Expand the `Agents.sendMessage` event in the activity log to see the full agent response captured in `agentResponse`.
 ## Understanding HTTP Variables in Webhooks
When working with webhooks in Prisme.ai, several HTTP variables are automatically available at the root level inside your endpoint automation:
* **query**: Contains query parameters from the URL
* **body**: Contains the request body (for POST/PUT requests)
* **headers**: Contains the HTTP request headers
* **method**: Contains the HTTP method used (GET, POST, etc.)
In our webhook example, we're passing the `query` variable to our Custom Code function and including both `headers` and `body` in the payload that triggers the summary-event.
## Version Control and Deployment
To manage your webhook integrations effectively:
Use the **Push** button in your workspace to create a new version.
As you make changes and improvements, create new versions to maintain a history of your work.
Select which version to deploy in your workspace settings.
For more information, see the documentation on [Version Control](/products/ai-builder/versioning) and [RBAC](/products/ai-builder/rbac).
## Monitoring and Logs
Keep track of your webhook activity and performance:
Open the Activity section from the Builder workspace sidebar to view detailed records of webhook calls, automation triggers, and AI operations.
Configure alerts for critical events or errors in your automations.
Use logs to identify patterns, bottlenecks, or areas for improvement.
## Extending Your Webhook Integration
Your base webhook system is powerful, but consider these enhancements:
* **Authentication**: Add API key validation or OAuth to secure your webhooks
* **Enhanced Processing**: Implement more complex data transformations in your Custom Code
* **Multiple Endpoints**: Create different webhook endpoints for various data sources or purposes
* **Error Handling**: Add comprehensive error handling and retry mechanisms
* **Integration**: Connect your webhooks to other systems like databases, messaging platforms, or CRMs
## Next Steps
Build an AI-powered document management system
Create intelligent contact form routing with AI analysis
Build a knowledge base agent using your own data
Learn to build more complex applications with Builder
## Understanding HTTP Variables in Webhooks
When working with webhooks in Prisme.ai, several HTTP variables are automatically available at the root level inside your endpoint automation:
* **query**: Contains query parameters from the URL
* **body**: Contains the request body (for POST/PUT requests)
* **headers**: Contains the HTTP request headers
* **method**: Contains the HTTP method used (GET, POST, etc.)
In our webhook example, we're passing the `query` variable to our Custom Code function and including both `headers` and `body` in the payload that triggers the summary-event.
## Version Control and Deployment
To manage your webhook integrations effectively:
Use the **Push** button in your workspace to create a new version.
As you make changes and improvements, create new versions to maintain a history of your work.
Select which version to deploy in your workspace settings.
For more information, see the documentation on [Version Control](/products/ai-builder/versioning) and [RBAC](/products/ai-builder/rbac).
## Monitoring and Logs
Keep track of your webhook activity and performance:
Open the Activity section from the Builder workspace sidebar to view detailed records of webhook calls, automation triggers, and AI operations.
Configure alerts for critical events or errors in your automations.
Use logs to identify patterns, bottlenecks, or areas for improvement.
## Extending Your Webhook Integration
Your base webhook system is powerful, but consider these enhancements:
* **Authentication**: Add API key validation or OAuth to secure your webhooks
* **Enhanced Processing**: Implement more complex data transformations in your Custom Code
* **Multiple Endpoints**: Create different webhook endpoints for various data sources or purposes
* **Error Handling**: Add comprehensive error handling and retry mechanisms
* **Integration**: Connect your webhooks to other systems like databases, messaging platforms, or CRMs
## Next Steps
Build an AI-powered document management system
Create intelligent contact form routing with AI analysis
Build a knowledge base agent using your own data
Learn to build more complex applications with Builder